Why I Decided to “Go All-USB” in my Podcast Studio
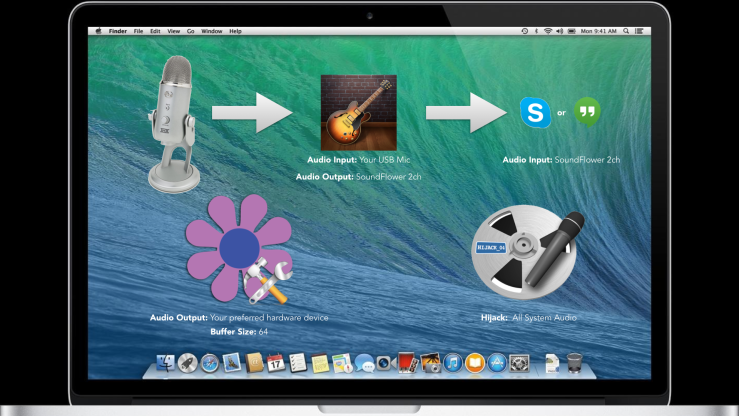
[Updated: Routing Diagram below]
Over the past few months, we’ve gradually moved my son up to the attic where my home office and home studio used to be, and I moved into what was his room, on the second floor.
During that time, my company also moved into our first offices in a co-working space in Manhattan, so my immediate need for a home office and studio wasn’t critical.
I’m pretty happy with my new home office – I have a door that I can close (my wife and I used to share the attic as office space) and a nice square room to setup some backdrops and such. (The attic has an angled ceiling. Over the past 13 years, I probably bumped my head a thousand times….)
Here’s what I discovered during the transition process: I own a sh*t-ton of audio gear. 😉
I used to record On Digital Media, roundtable-style in my studio and needed to be prepared to have three to four panelists for any given episode.
I’ve since moved on to other podcast projects that don’t require nearly as much gear or studio preparation.
Some of the gear I own includes: three mixers (two analog Behringer mixers and an Alesis Firewire model), two MXL 990’s, a KEL Audio HM-1, an MXL 604, an AKG Perception 100, a Behringer VX2000 channel strip, a Zoom H4 portable audio recorder, a bunch of inexpensive USB AD/DA adapters (from VOIP headsets) and tons of gear that I use on-location at conferences. Here’s an example.
The “Temporary” USB Solution
Due to my nomadic situation, I’ve been using a Samson Go Mic for almost everything.
As a result, I’ve discovered something else during this transition: I like the level of simplicity that a USB mic provides.
Of course, my current workflow is probably too simple, since I don’t have any redundancy right now, but here it is:
I setup my Go Mic in one of the primary USB ports on my MacBook Air
My headphones plug into the Go Mic’s built-in 1/8″ jack for monitoring
I record the whole thing using Google Hangouts on Air
When I’m done recording, I download the MP4 video file from YouTube, strip out the audio and drop in an intro using Fission, then post the final audio to the podcast feed. Sometimes I’ll trim it or run the audio through the Levelator before I add the intro, but that’s about it.
Given it’s small size and reasonable cost, I’ve been amazed at what the Go Mic can do. Like all condenser mics, it captures a fair amount of ambient noise, but the sound quality is pretty darn good.
And it’s nice not having tons of gear laying around.
Even so, when I finally moved into my new home office, I was excited to again have some space. I immediately setup a mixer, the channel strip and my KEL Audio HM-1 on a desktop mic stand and started getting acclimated to my surroundings.
I was pretty much ready to kick the “USB-vs-XLR” argument to the curb when I had a new (not-so-pleasant) discovery: ground hum. There was an unbelievable amount of ground hum using the outlets in this room and I couldn’t get rid of it.
Sure, I could have purchased a variety of gear to possibly get rid of it but my simple response was, “Why?”.
I haven’t experienced ground hum in more than a year because I’ve been using a USB mic during that entire time!
I sat down and weighed the pros and cons of professional XLR gear and USB gear. (Specific to my current needs, of course. Your needs may differ.)
XLR
Pros
- Access. I already own a ton of professional gear and have enough stuff to satisfy even the craziest of situations.
- Versatility. XLR gear is versatile and provides lots of options during said crazy situations.
- The sound is great.
- Belt and Suspenders. It’s easy to record backup/scratch audio using a portable audio recorder or iOS device.
Cons
- Complexity – ground hum interference, cabling, etc.
- Clutters my workspace
USB
Pros
- Simplicity
- Portability
- Sound is very good
- Less gear required = less clutter
- Easy to use with Skype, Google Hangouts
Cons
- Doesn’t sound great like my XLR gear
- Less versatile, flexible – you can’t just connect another mic to the mixer – because there isn’t one. Multi-mic setups with USB can get tricky.
- Recording backup/scratch audio is challenging. You can’t just hang a recorder off the mixer – because there isn’t one.
But for me, the primary objection to going all-USB was the lack of channel strip/voice processing for use with Skype or Google Plus Hangouts on Air.
There’s nothing like having a compressor and noise gate when you’re recording with condenser mics.
BOOM
I then had an epiphany and decided to go all-USB.
Just. Like. That.
Here’s why: I remembered my past experiences with Soundflower, GarageBand and Audio Hijack Pro.
On a Mac, Soundflower allows you to route audio from one application or input/output channel using nothing but the Mac’s built-in audio capabilities.
I knew that if my recording software supported Audio Units (which would let me tailor my mic to my liking) but also allowed me to configure the output channel, I could use the software as a channel strip!
So, what software is the best value in audio production on the Mac?
GarageBand, of course.
GarageBand has input and output controls, which can be found in Preferences.
After connecting the Go Mic as the input, the first thing to do was create the vocal sound I wanted using GarageBand’s effects plugins.
Note: Monitoring should be set to “On”. I’ve had better results with the “On – No Feedback Protection” setting.
Once I created the sound I was looking for (and could always change later – it’s software!) I saved the settings as a GarageBand “Instrument” that I named “Go Mic”.
Next, I went to GarageBand preferences and selected “Soundflower 2ch” as my output.
I was halfway there.
At this point, the next most important test would be with Google Hangouts and Skype. I decided to test Skype first, since I could have lengthy conversations with the “Skype Test Call” Lady. 😉
In Skype preferences, I changed the Input channel to be GarageBand’s Output channel (“Soundflower 2ch”).
Finally, I had to route Soundflower’s output to a hardware device that I could use. I chose a Logitech USB AD/DA device. that I connected to a powered USB 3.0 hub.
Note: SoundFlower buffer size should be set to 64 to mitigate any latency.
It was time to dial the Skype Lady.
Voila!
I had a USB mic tuned to my liking using GarageBand as a channel strip and could hold repeatable conversations with the Skype Lady.
Next, I dialed up a friend over Google Hangouts to make sure it also worked and sure enough, it did.
So, there you have it: zero-cost vocal processing that can be used to record audio and video direct-to-disk or used with video conferencing or VOIP applications.
After that, I had only one thing left to figure out: recording backup/scratch audio.
That’s where Audio Hijack Pro comes in.
AHP allows you to “hijack” the output channel from pretty much all software on your Mac.
I’ve used it to record Skype calls, audio from my browser, audio directly from a mic – you name it.
I was hoping to be able to record both the input and output channels I described above but this proved more difficult than expected. I might still be able to figure it out but for now, I simply shut down any software that makes noise during production and set AHP to record all system audio.
If, for instance, I forget to set Skype to “Do Not Disturb” I can occasionally get a random notification sound in the final mix but otherwise, it’s good enough for backup audio.
[Update: Routing Diagram below]
Upgrading the Gear
While the Go Mic is good in a pinch, I know that the capsule is a bit small and that the frequency response isn’t as good as other mics – USB or otherwise.
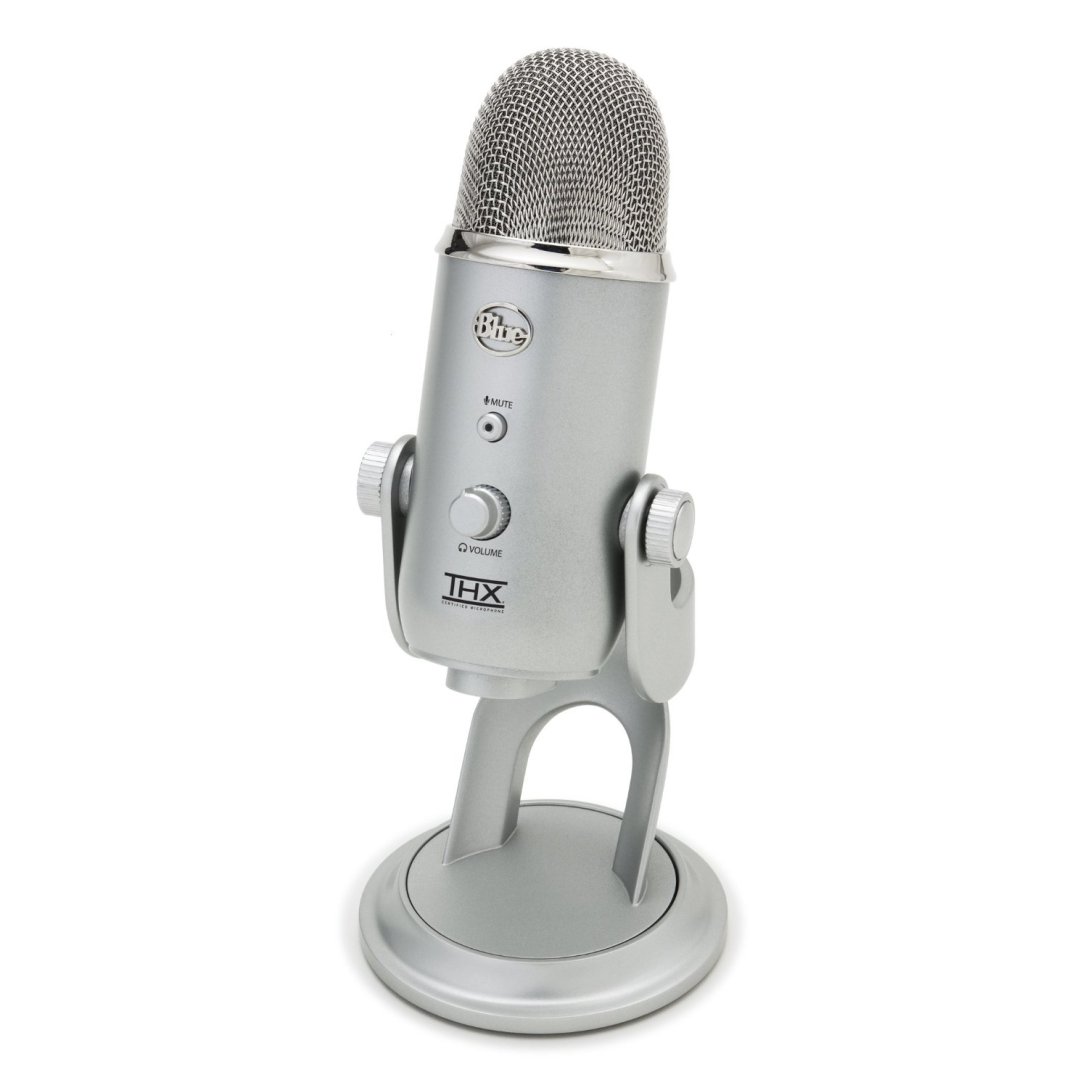
After a bit of research and input from the Podcaster communities on Google Plus, I settled on a Yeti USB Mic from Blue Microphones.
Coupled with Blue’s Radius Shockmount and my software “control strip”, it makes for a great-sounding setup.
I’ll still use the Go Mic at the office or when I’m traveling – it’s so small and light that I always have it in my bag.
What’s next? eBay.
Anyone want to buy a channel strip? How about a mixer? A condenser mic, maybe? I can make you a good deal…


